

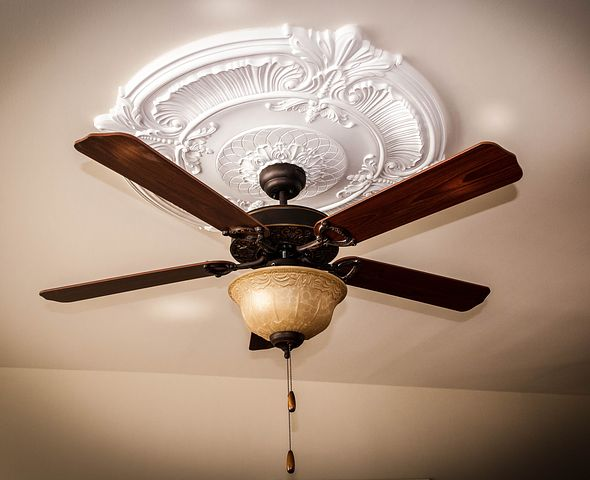
 Ceiling fans can help lower your energy bills all year round, because they keep your home cooler in the summer and, if you reverse the direction of the blades, warmer in the winter. And it’s not hard to install your own ceiling fan, as long as you already have the wiring in place.
You can remove an existing light fixture and connect your new ceiling fan to the wiring. You’ll need to install a fan-rated electrical box, fastened either directly to a ceiling joist or to a sturdy support brace in the ceiling. Most fans have an installation hook on the mounting bracket, so you can probably complete the job alone in just a couple of hours.
Work Safely with Your Home’s Wiring
Before you start working on your home’s wiring, go to the breaker box and shut off the power to the circuit you’ll be servicing. Use a circuit tester to make sure the circuit in the room where you’ll be working is really shut off before you start working with the wiring.
Prepare the Support Brace and Mounting Hardware
Once you’re sure the power is out in the room, remove the light fixture you’ll be replacing. Remove the glass globe or other light covers and bulbs. Loosen the mounting nut and any other screws that secure the light fixture to the electrical box in the ceiling. Disconnect the wiring to the light fixture and leave it hanging out of the ceiling.
If the electrical box for your light fixture was mounted on a ceiling joist, you can remove it and mount a fan-rated pancake electrical box directly to the joist to support your new ceiling fan. Ceiling fans are heavy, so you need an electrical box rated to hold one up. It should be fastened directly to the joist, or to a support brace between the joists. If you can access your ceiling joists from above, you can install a support brace made out of a length of 2×4 lumber attached to the joists with two- to three-inch decking screws. Otherwise, you can use an expanding metal support brace, which you can insert through the hole in the ceiling and ratchet open between the joists. Spikes on the ends of the mounting bracket will dig into the wood of the joists and hold it in place. Attach your electrical box to the brace. Pull the house wiring down through the electrical box.
Install the Fan
When you buy your ceiling fan, it will come with instructions to help you install it, and you should definitely follow them, but most fans are installed in pretty much the same way. Attach the fan’s mounting bracket to the electrical box, and use the installation hook on the bracket to hold the fan in place while you connect the wires in the fan motor assembly to your house wires. Connect the white wire coming out of your ceiling with the white wire coming out of your fan, and secure the connection with wire connectors. Do the same with the two black wires. Connect the grounding wires to each other and to the ground screw in the electrical box.
Attach the mounting hardware that secures the fan motor assembly to the mounting bracket. If there’s a light fixture on the fan, wire it up the same way you wired up the fan motor assembly. Then put the fan blades on and attach any decorative light covers. When attaching the fan blades, make sure to screw them on as tight as you can — you don’t want one coming loose and falling or flying off.
Add the Finishing Touches
Some ceiling fans come with fancy wall controls, especially sophisticated smart models. If you have the traditional type of ceiling fan that turns on and off at the light switch, it should already be wired up. You can remove your old light switch and install a new ceiling fan wall control using the same wiring.
Installing a ceiling fan yourself isn’t difficult. The main thing is to remember to wire it up properly and secure the grounding wire to ground screw in the electrical box or, failing that, to the metal of the box itself. It’s really just a matter of following the instructions that come with the fan — so for a couple of hours of work, you can have a feature that improves your home’s look at comfort.
 POSTED BY