

As summer starts to roll around, we’re all thinking about the same thing. It’s hardly a mystery at this stage.
We’re all planning how we’re going to take advantage of all of that warmth and all of that sunshine.
Depending on where you are you might be getting three or four months of it. In the first week when the sun first shows up this feels like a lot of time. But it goes away pretty quickly.
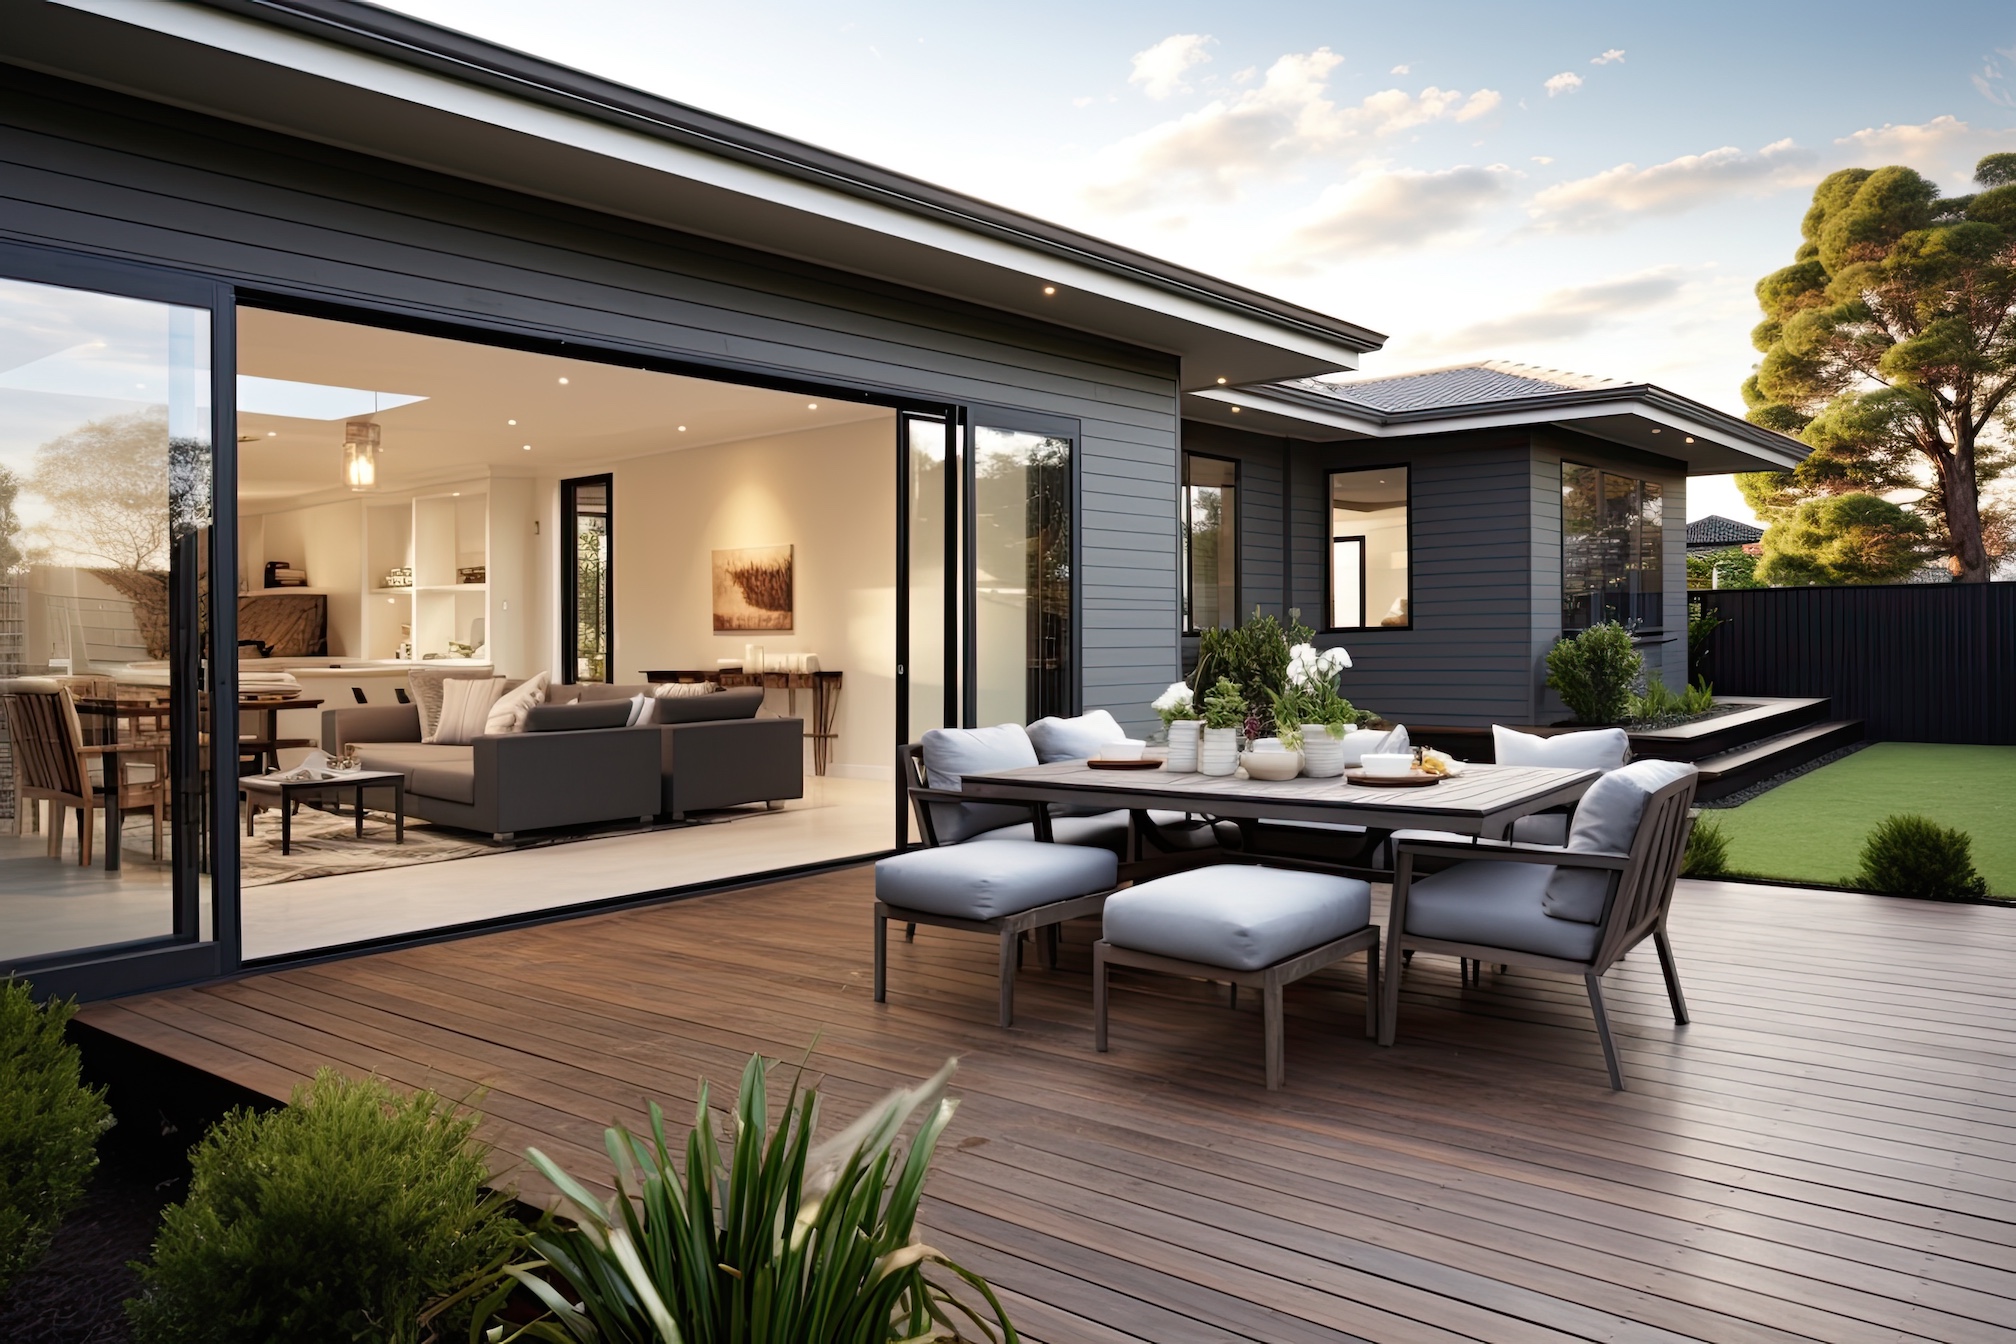
So you’ve got to strike while the iron is hot. Or rather, strike when the weather is hot. Something a lot of people love to do, is enjoy a nice drink outside in the garden.
Those Saturday evenings when it got dark and cold around six o’clock over, and you can hang out on your patio with a few beers for hours.
The irritating thing about this is the fact that if you want another drink and you want it to be cold, you usually have to walk back into the kitchen and over to the fridge for it.
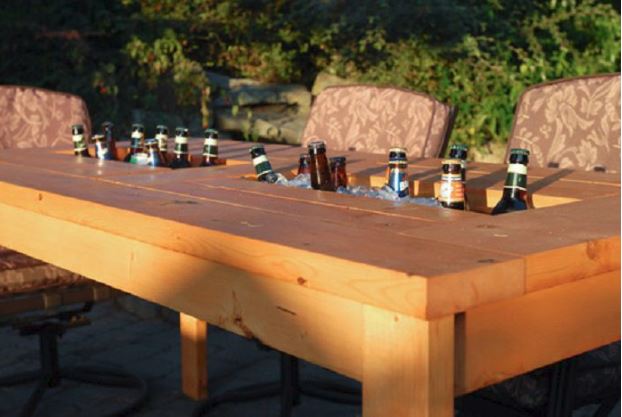
Of course it’s not a massive problem and you could always bring out a cooler with you. But wouldn’t it be great if the cooler was actually built into the table?
All of the wine, beer, soft drinks, water, whatever your drinking, right there in front you. Fresh, cold and ready when you are.
No one in the group even needs to look away from the table to get another drink because the cooler is built into the centre.
It’s one of the best ideas out there for summer, and there’s a couple of ways you can make one of your own:
So this first one here from is the smaller of the two models that we’re going to be discussing here and it will be nice and compact for your garden.
The process of making the table is similar in both methods but this is the less complicated of the two. The goal here was to keep it as simple as possible.
You’ll be using two plastic planter boxes to hold the drinks and then structuring the rest of the tabletop around these two containers.
This is in three main parts. You start by making two rectangles of wood to hold the boxes and then two large frames that will make up the base of the table top.
These frames are pretty straight-forward. Two long boards, with two shorter boards in the middle to brace the box supports.
The rest of the tabletop is just seven strategically cut boards to which you will attach the frames. And then there’s just the legs and the varnishing.
You’ll need quite a bit of equipment to put these together and a good table saw is probably the most important part for this one.Check out remodelaholic.com here for a full tutorial. As we said, this is the smaller and less complicated of the two choices and as such, it’s not as sturdy as the more thorough approach.
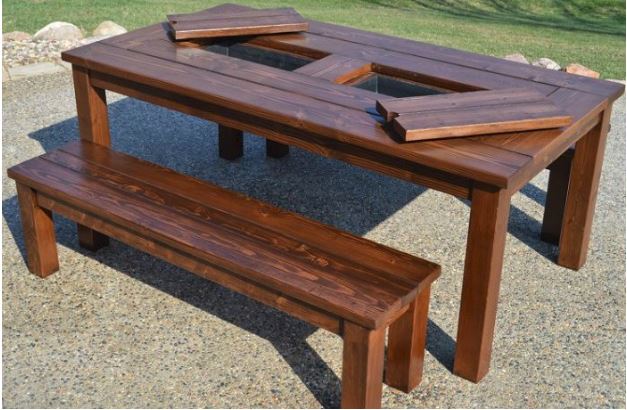
This second model is the one that you should probably go for if you want a more stable end result.
It’s also bigger though as we’ve mentioned already so make sure that you’ve got enough space for it.
The big difference here is in the supports for the coolers. You’ll still have to buy the plastic planters, but the part of the table that will be holding them is more well put together.
Instead of just a rectangle of wood, these supports are basically a well built box that can be easily slotted in and out of the table.
You’re also not relying entirely on the planters themselves to support all of the drinks, and there’s less likely to be wear on the actual tabletop itself.
Speaking of which, more planning goes into the top of the table to ensure a stronger platform. This means more cutting but it’s probably worth it.
You’ll also be doing an awful lot of sanding with this one so you will want to have a good electric sander at hand.
Find the full tutorial here at domesticated-engineer.com.
Conclusion
So there you have it. There’s two similar enough methods at putting together a good wine cooler table that both have their advantages.
You can either go for the strong but complex table that will last your for a long time, or you can choose the one that you can put together easily that may lack some durability.
Either way, you’re sure to be enhancing your summer experience.
 POSTED BY