

Homeowners have long revered the KILZ brand of paint for covering up walls with massive problems. Landlords use it to help cover up smoke-stained walls and water damage. Homeowners love its coverage and ability to cover bright reds and dark browns.
Mould, however, is a different beast. Many people think they can paint over fungal growths. Maybe buying the mould-resistant version of KILZ will kill the mould and let them decorate their walls.
These folks are always perplexed when the mould comes right back.
The mould isn’t like other dirt spots or stains. It is a living microorganism vital in digesting dead wood into the dirt. It has detected the dampness in your wall and believes it needs to digest your house. The worst part is that mould isn’t deterred by paint.
Mould can also cause health problems. Black mould is especially dangerous due to the spores it produces. It can create stomach pain, breathing problems, headache, and fatigue.
In addition to black mould, there are other mould types. Some folks want to try natural remedies such as vinegar or borax acid. However, mould’s health risk is worse than properly handled chemicals. This guide will provide the best solution for killing black mould without risking yourself more than necessary. It’s always recommended to talk to a local mould remediation company in your area to seek professional advice.
What is the best way to cover mould? Is there a paint that kills mould? Here is the easy step-by-step solution you are looking for.
Step #1 Solve The Water Problem
mould thrives where there is a damp surface. The first order of business is to solve that dampness. If the mould results from a leaky roof or broken pipe, solving the dampness problem is fairly straightforward: stop the water flow and use blowers to dry out the wet area.
Most people find renting dehumidifiers and blowers to dry wet wood more cost-efficient. H
If you are dealing with mould on a porch or exterior wood, it pays to “look up.” Often this water comes from above. A gutter may overflow, causing the wood to rot from the constant dampness. Or trees might be dropping water on the wood for days following every rain storm.
Another common problem is damp crawlspaces. Damp crawlspaces are a haven for mould and will coat the entire underside of a house with mould growth if given a chance.
If you are dealing with a damp crawlspace, It could be that your house needs some landscaping to route water around the crawlspace. Additionally, the crawlspace vents should be left open to ensure it airs out properly.
A mildewing bathroom is also shared. Older bathrooms tend to lack proper ventilation. Adding a vent — even a passive vent — can do a lot to help remove mildew problems in a bathroom. If you have a vent, turn it on while you shower.
If installing a vent isn’t an option, you can put a dehumidifier in the bathroom to remove the moisture from the air.
Step #2 Kill The mould
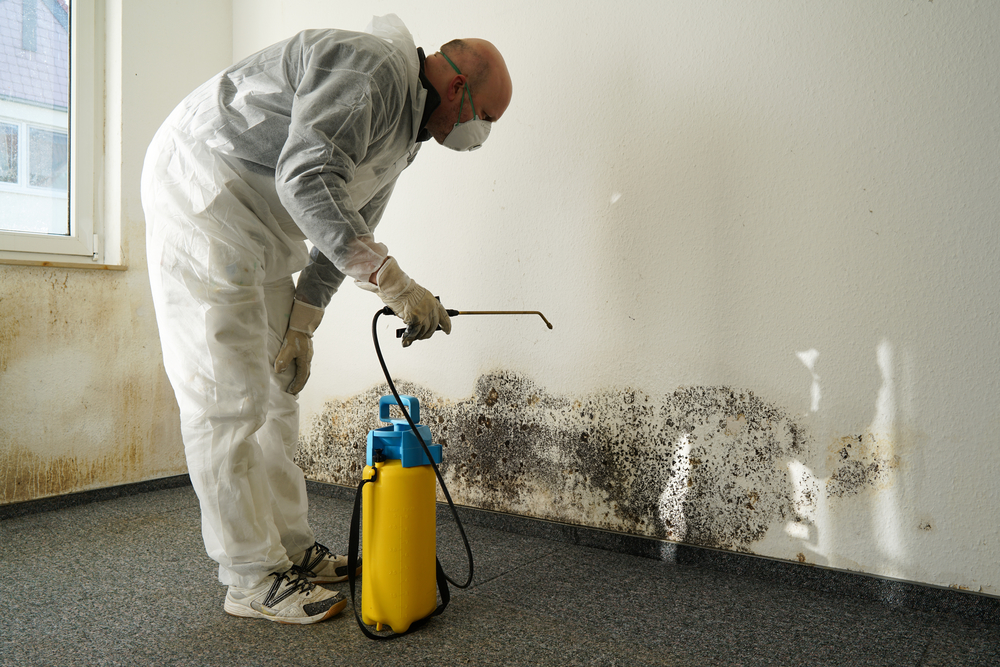
Once you’ve solved the dampness, it is time to kill the mould. Wear a heavy-duty respirator like the 3M mould remediation respirator kit. Mould in the lungs can cause irreversible damage. It is worth the investment in proper breathing equipment to protect your lungs.
Many people choose to use bleach to kill the mould. Bleach is very efficient for that purpose. To use bleach, mix your bleach so that it is one cup of bleach with one gallon of water and spray it onto the area.
However, bleach is only good for killing mould on the surface of non-porous surfaces. If you are fighting a fungus growing on drywall or wood, use a fungicide designed to penetrate and kill the mould roots inside the wood.
A reliable mould killer is the Concrobium brand aerosol. This aerosol can of fungicide is sold online and by almost any local hardware store. Wear your mask when applying it, but it is highly effective at killing and preventing the recurrence of mould growth.
Step #3 Prep and Prime The mouldy Surface
You wouldn’t paint a dirty wall, would you? In the same way, you want to remove the now-dead mould.
It is recommended to continue wearing your mask for this part. Once the mould killer has time to dry, it is time to scrape, sand, and remove the mould. Some people try to use vacuums to remove the sanded dust, but this risks further disseminating the fungus spores into the air.
A rag dampened with bleach water or Windex works well for removing tiny dust particles and cleaning the area once you have fully sanded and scraped the area.
Once the area has been cleaned, it is time to prime the surface. This is where I like to use Kilz or another mould-inhibiting product. These primers are not mould killers but discourage the mould’s recurrence.
If you are painting a deck, use a mould-resistant primer to help provide an added barrier against future mould problems.
Step # 4 Paint The mould
Choose a high-quality brand of paint. Many cheap consumer grades are affordable, but these paints tend to form a weaker bond with the wall and commonly have bubble or chip issues.
A good-quality paint brand will cost around $35 per gallon. It isn’t cheap but requires lighter coats and goes on much faster and smoother. The finished product lasts for years with minimal touch-ups, causing the paint to pay for itself in the long term.
As you approach your mould problem, if you feel unqualified to handle your problem, there are many local mould remediation experts you can call in for a free consultation.
 POSTED BY